Pole Sheds NZ: Quality Sheds & Shelters
The Smarter Alternative to Pole Sheds. Comparing pole shed NZ prices or working through pole shed plans? Choosing a Tough Shelter gives you the cover of a farm pole shed, with more flexibility, lower costs, and the ability to move or expand when your needs change. Built tough for New Zealand farms, businesses, and worksites, our shelters protect against the elements without tying you down.
Find Your Ideal Pole Shelter
Refine your search for your ideal shelter by selecting your size requirement below
Pole Sheds & Shelters That Meet Your Needs
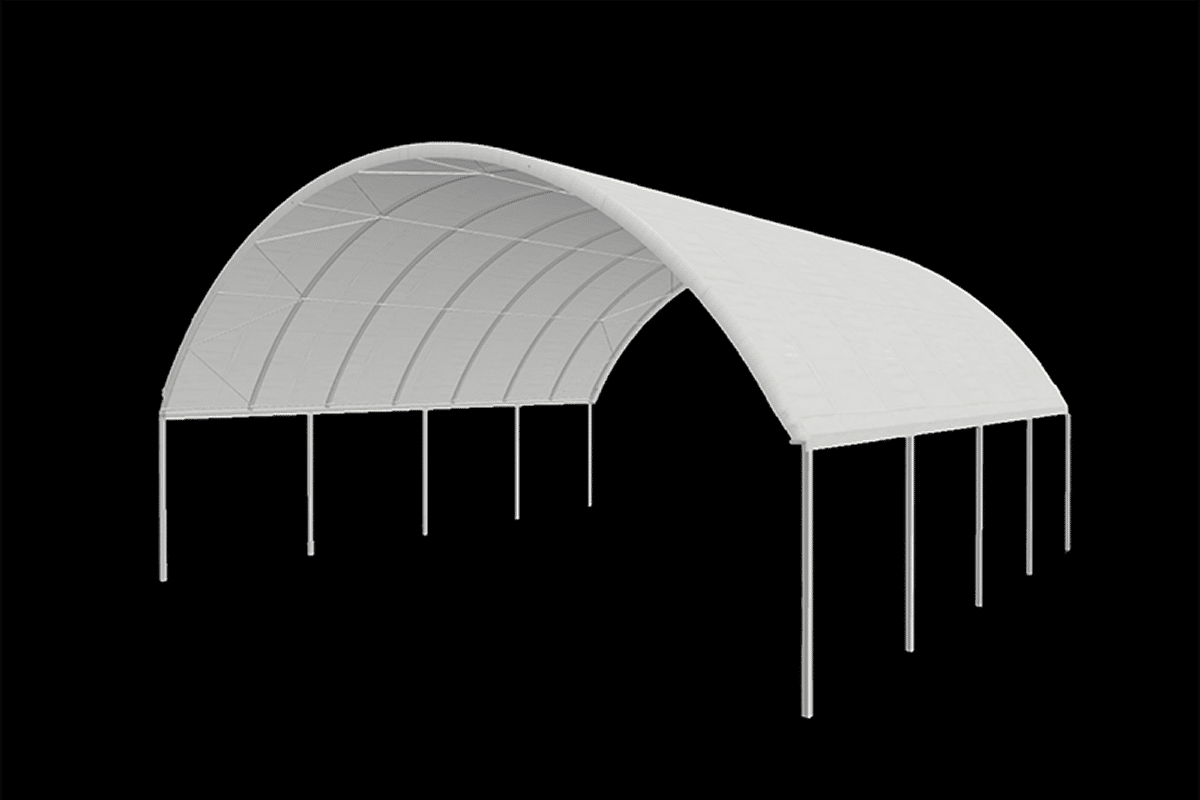
6m Wide x 6m Long
No End Wall
- No End Wall
- 5.8m Span Between Posts
- Customisable Overall Height
- 6m Depth
- 34.8sqm Covered Area
6m Wide x 12m Long
No End Wall
- No End Wall
- 5.8m Span Between Posts
- Customisable Overall Height
- 12m Depth
- 69.6sqm Covered Area
8m Wide x 6m Long
No End Wall
- No End Wall
- 7.7m Span Between Posts
- Customisable Overall Height
- 6m Depth
- 46.2sqm Covered Area
8m Wide x 12m Long
No End Wall
- No End Wall
- 7.7m Span Between Posts
- Customisable Overall Height
- 12m Depth
- 92.4sqm Covered Area
10m Wide x 6m Long
No End Wall
- No End Wall
- 10.12m Span Between Posts
- Customisable Overall Height
- 6m Depth
- 60.72sqm Covered Area
10m Wide x 12m Long
No End Wall
- No End Wall
- 10.12m Span Between Posts
- Customisable Overall Height
- 12m Depth
- 121.44sqm Covered Area
12m Wide x 6m Long
No End Wall
- No End Wall
- 12.12m Span Between Posts
- Customisable Overall Height
- 6m Depth
- 72.72sqm Covered Area
12m Wide x 12m Long
No End Wall
- No End Wall
- 12.12m Span Between Posts
- Customisable Overall Height
- 12m Depth
- 145.44sqm Covered Area
14m Wide x 12m Long
No End Wall
- No End Wall
- 14.12m Span Between Posts
- Customisable Overall Height
- 12m Depth
- 169.44sqm Covered Area
14m Wide x 12m Long
Half End Wall
- Half end wall
- 14.12m Span Between Posts
- Customisable Overall Height
- 12m Depth
- 169.44sqm Covered Area
6m Wide x 6m Long
Half End Wall
- Half End Wall
- 5.8m Span Between Posts
- Customisable Overall Height
- 6m Depth
- 34.8sqm Covered Area
6m Wide x 12m Long
Half End Wall
- Half End Wall
- 5.8m Span Between Posts
- Customisable Overall Height
- 12m Depth
- 69.6sqm Covered Area
8m Wide x 6m Long
Half End Wall
- Half End Wall
- 7.7m Span Between Posts
- Customisable Overall Height
- 6m Depth
- 46.2sqm Covered Area
8m Wide x 12m Long
Half End Wall
- Half End Wall
- 7.7m Span Between Posts
- Customisable Overall Height
- 12m Depth
- 92.4sqm Covered Area
10m Wide x 6m Long
Half End Wall
- Half End Wall
- 10.12m Span Between Posts
- Customisable Overall Height
- 6m Depth
- 60.72sqm Covered Area
10m Wide x 12m Long
Half End Wall
- Half End Wall
- 10.12m Span Between Posts
- Customisable Overall Height
- 12m Depth
- 121.44sqm Covered Area
12m Wide x 6m Long
Half End Wall
- Half End Wall
- 12.12m Span Between Posts
- Customisable Overall Height
- 6m Depth
- 72.72sqm Covered Area
12m Wide x 12m Long
Half End Wall
- Half End Wall
- 12.12m Span Between Posts
- Customisable Overall Height
- 12m Depth
- 145.44sqm Covered Area
6m Wide x 6m Long
Full End Wall
- Full End Wall
- 5.8m Span Between Posts
- 4.6m Overall Height
- 6m Depth
- 34.8sqm Covered Area
6m Wide x 12m Long
Full End Wall
- Full End Wall
- 5.8m Span Between Posts
- 4.6m Overall Height
- 12m Depth
- 69.6sqm Covered Area
8m Wide x 6m Long
Full End Wall
- Full End Wall
- 7.7m Span Between Posts
- 5.6m Overall Height
- 6m Depth
- 46.2sqm Covered Area
8m Wide x 12m Long
Full End Wall
- Full End Wall
- 7.7m Span Between Posts
- 5.6m Overall Height
- 12m Depth
- 92.4sqm Covered Area
10m Wide x 6m Long
Full End Wall
- Full End Wall
- 10.12m Span Between Posts
- 4.4m Overall Height
- 6m Depth
- 60.72sqm Covered Area
10m Wide x 12m Long
Full End Wall
- Full End Wall
- 10.12m Span Between Posts
- 4.4m Overall Height
- 12m Depth
- 121.44sqm Covered Area
12m Wide x 6m Long
Full End Wall
- Full End Wall
- 12.12m Span Between Posts
- 5.3m Overall Height
- 6m Depth
- 72.72sqm Covered Area
12m Wide x 12m Long
Full End Wall
- Full End Wall
- 12.12m Span Between Posts
- 5.3m Overall Height
- 12m Depth
- 145.44sqm Covered Area
14m Wide x 12m Long
Full End Wall
- Full End Wall
- 14.12m Span Between Posts
- 6.7m Overall Height
- 12m Depth
- 169.44sqm Covered Area
6m Wide x 6m Long
Full End Wall With Mechanical Door
- Full End Wall with Mechanical Door
- 5.8m Span Between Posts
- 4.6m Overall Height
- 6m Depth
- 34.8sqm Covered Area
6m Wide x 12m Long
Full End Wall With Mechanical Door
- Full End Wall with Mechanical Door
- 5.8m Span Between Posts
- 4.6m Overall Height
- 12m Depth
- 69.6sqm Covered Area
8m Wide x 6m Long
Full End Wall With Mechanical Door
- Full End Wall with Mechanical Door
- 7.7m Span Between Posts
- 5.6m Overall Height
- 6m Depth
- 46.2sqm Covered Area
8m Wide x 12m Long
Full End Wall With Mechanical Door
- Full End Wall with Mechanical Door
- 7.7m Span Between Posts
- 5.6m Overall Height
- 12m Depth
- 92.4sqm Covered Area
10m Wide x 6m Long
Full End Wall With Mechanical Door
- Full End Wall with Mechanical Door
- 10.12m Span Between Posts
- 4.4m Overall Height
- 6m Depth
- 60.72sqm Covered Area
10m Wide x 12m Long
Full End Wall With Mechanical Door
- Full End Wall with Mechanical Door
- 10.12m Span Between Posts
- 4.4m Overall Height
- 12m Depth
- 121.44sqm Covered Area
12m Wide x 6m Long
Full End Wall With Mechanical Door
- Full End Wall with Mechanical Door
- 12.12m Span Between Posts
- 5.3m Overall Height
- 6m Depth
- 72.72sqm Covered Area
12m Wide x 12m Long
Full End Wall With Mechanical Door
- Full End Wall with Mechanical Door
- 12.12m Span Between Posts
- 5.3m Overall Height
- 12m Depth
- 145.44sqm Covered Area
14m Wide x 12m Long
Full End Wall With Mechanical Door
- Full End Wall With Mechanical Door
- 14.12m Span Between Posts
- 6.7m Overall Height
- 12m Depth
- 169.44sqm Covered Area
We can provide the same wall options for our Pole Shelter range as shown for container dome shelters.
Our Pole Sheds & Shelters Across New Zealand
See how Tough Shelters’ Pole Shelters are built tough for New Zealand conditions. From calf shelter solutions and farm cover to industrial storageto industrial storage, these shelters offer a strong alternative to traditional pole sheds NZ with the flexibility to adapt as your needs grow.

6m x 12m Calf Shelter front

6m x 6m Pole Shelter

8m Span x 40ft Shelter Container to Poles

8m Span x 60ft Pole Shelter Side View

8m Span x 60ft Pole Shelter

10m Span x 40ft Shelter Container to Poles

12m x 12m Cattleyards Pole Shelter Aerial View

12m x 12m Cattleyards Pole Shelter

12m x 12m Cattleyards Pole Shelter

Poles to Container Shelter

14m x 24m pole shelter scaled

14m x 24m pole shed scaled

14m x 24m pole shed NZ scaled

14m x 24m farm pole shed
Why Choose a Pole Shelter Over a Traditional Pole Shed NZ?
Many Kiwis start out searching for pole sheds or farm pole sheds but often discover that a Pole Shelter makes more sense. Here’s why:

More Versatile
Unlike fixed pole sheds, our shelters can be relocated, extended, or reconfigured to suit changing needs.

Cost-Effective
Pole sheds in NZ can be expensive to design and build. Pole Shelters deliver protection at a lower price point, without sacrificing cover and strength.

Faster to Install
Forget waiting months for builders or navigating pole shed plans. Our Pole Shelters are engineered systems that can be up and working within days.

Proven Strength
Built to AS/NZS1170.2:2021 standards and ISO9001 accredited, with heavy-gauge steel framing and a 10-year warranty.
Built Tough. Priced Fair. Trusted Locally.
At Tough Shelters, we do things differently. Where others hide costs, we’re transparent and fair. We deliver exactly what’s needed, no fluff, just shelters that work.

Certified
Strength
Engineered and certified for tough New Zealand conditions.

Built to
Outlast
UV-resistant, double-stitched covers and heavy-duty framing that go the distance.

Trusted
Locally
Designed, engineered, and proven in NZ conditions.

Straightforward
Pricing
Clear quotes, no hidden extras, and value you can measure against traditional pole shed NZ prices.
Ready For a Tough Shelter?
Skip the complications of pole shed plans and fixed construction. Choose a Pole Shelter that adapts to your site demands and keeps your assets protected.